Shopify blog

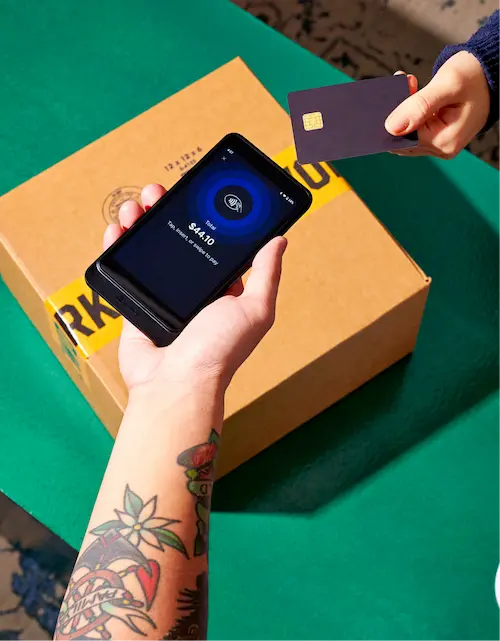


Barcode inventory management is the process of using scannable barcodes to identify products and track stock levels.
Inventory distortion—the cost of stockouts and overstocks—remains expensive for retailers. IHL Group estimates that it cost global retailers $1.7 trillion in 2026, which represents 6.2% of global retail sales.
This guide explains how barcode inventory management works and how to set up a system.
What is barcode inventory management?
Barcode inventory management is the process of using machine-readable barcodes and scanners to record inventory activity.
A barcode inventory management system links each code to a product record. It updates stock data as items are received, transferred, sold, or returned across locations and sales channels.
Internal barcodes are created for use within a retailer’s own system. Global barcodes encode standardized identifiers such as GS1 Global Trade Item Numbers (GTINs), which retailers and marketplaces can recognize worldwide.
Retailers can scan barcodes during:
- Receiving. To keep track of items as they enter a warehouse or store.
- Moves, putaway, and transfers. To record an item’s new location.
- Sales and returns. To minimize point-of-sale (POS) activity or restore on-hand inventory counts.
On Shopify, POS and online inventory data live in one place. Therefore, sales and returns automatically update on-hand quantities, while receiving and transfer workflows adjust counts by location. Current inventory data informs reorders, inventory allocation, and markdowns.
How a barcode inventory management system works
In retail, a barcode inventory management system records product activity from receiving through to sale. The steps of the process are:
- Assign barcodes. First, you will assign a unique barcode to each product variant. The barcode encodes an ID that connects to the product record. The record contains the product name, internal SKU, price, and inventory quantities by location.
- Print and label. Print and apply labels to products and cases. Labels for aisles, shelves, or bins make it easier to record movements within a store or warehouse.
- Scan at point of sale. The cashier scans the barcode to identify the item at checkout. Completing the sale deducts the quantity from the relevant location.
- Receive and update inventory. Staff scan incoming products and confirm the quantities received. The system updates the inventory records for that location.
- Monitor stock and reorder. Set a low-stock threshold for each product. When inventory falls below it, the system can send an alert or trigger a reorder workflow to keep bestsellers available.
- Analyze data for reports. Inventory tracking and sales data feed reports that identify which products need replenishment and which are selling slowly.
Multilocation barcode tracking maintains separate inventory counts for each store, warehouse, or fulfillment location. Scans and transfers record quantity changes at the relevant location, so teams can see where stock is held. In Shopify, stores can track and adjust inventory quantities at every location and choose where each product is active for selling or fulfillment.
Plan your barcode system
Your barcode system requires four components:
- Software to store product records and inventory quantities
- Barcodes and labels to give each product variant or location a scannable ID
- Scanners to capture codes during checkout and inventory work
- Printers to produce labels for products, cases, shelves, or bins
Here’s how to choose the components that work best for you:
Select inventory software
Start by choosing inventory management software with barcode scanner compatibility. Barcode inventory software needs to connect each scan to the correct product and location.
Look for:
- Product records. These map each barcode to the correct variant and SKU.
- Location tracking. This maintains separate quantities for each store or warehouse.
- Inventory updates. This records receipts, transfers, sales, and returns.
- Reordering. This provides low-stock alerts and purchase-order workflows.
- Reporting. This shows stock history and sales trends.
Shopify’s inventory management system is built into the Shopify admin. It tracks inventory by location across online and retail sales. Merchants can also manage stock held in warehouses or by third-party fulfillment services.

Choose a barcode symbology
Align the barcode format to the data the system needs to capture.
| Feature | 1D/UPC | 2D/QR |
|---|---|---|
| Format | Vertical bars read horizontally | Square pattern read horizontally and vertically |
| Data | Encodes a GTIN | Can encode a GTIN plus batch, expiry, or web data |
| Common use | Product identification at checkout | Traceability, inventory records, or product information |
| Scanner | 1D or 2D scanner | 2D imaging scanner or phone camera |
UPCs are the standard for product identification at checkout. A UPC encodes only the item’s Global Trade Item Number (GTIN). Inventory software uses that number to retrieve the product record.
QR code inventory management fits workflows that require more data per scan. A QR code can carry a batch number, expiration date, or web link. A GS1 2D barcode can also include the product’s GTIN for checkout.
In a 2025 consumer survey, GS1 US found that 79% of respondents were more likely to buy products with scannable QR codes that provide additional product information.
GS1’s Sunrise 2027 initiative sets an industry goal for POS systems to read and process 2D barcodes by the end of 2027. During the transition, retailers can use UPCs at checkout and QR codes for internal tracking or product information.
Pick scanners
A phone suits occasional receiving and cycle counts, but a dedicated scanner works better for frequent checkout or high-volume inventory work.
Both options can:
- Add products to a POS cart
- Receive inventory from purchase orders
- Perform inventory counts
Shopify works with several scanning options:
- Zebra DS2208 reads 1D and 2D barcodes. It connects to compatible iPad or Android tablets through USB.
- Socket Mobile S740, S720, and CHS 7Qi read printed or digital 1D and 2D barcodes over Bluetooth.
- The Shopify app uses a phone or tablet camera to assign product barcodes and adjust inventory quantities.
Choose a barcode label printer
Choose a printer based on label size and daily print volume. Confirm the connection type and software requirements before buying.
Available barcode label printers vary by region. The Shopify Hardware Store offers compatible printers for any price range.
Models like the DYMO LabelWriter 550 or Zebra ZD220 are popular options for their affordability and print quality. You can also opt for a high-speed printer like the Brother QL Wifi Label Printer.
Print one sample label before producing a full batch. Scan it to verify that it opens the correct product record. Check the label size on the product, shelf, or bin.
Set up your barcode inventory system: a six-step guide
- Generate and assign barcodes
- Print and place barcodes
- Label your inventory
- Configure hardware and software
- Make a test run
- Train employees on scanning procedures
1. Generate and assign barcodes
Start with the identifier. If products already carry a GS1 GTIN (UPC or European Article Number) from the supplier, reuse it.
For private label items, create GTINs and assign one unique GTIN per sellable variant (every size/color/style) and separate GTINs for higher‑level packaging such as inner packs or cases.
Next, create barcodes for them. Shopify’s Retail Barcode Labels app can generate unique barcodes for products and variants, then print them on supported label sizes and printers.
2. Print and place barcodes
If you try to get creative with your labels, like adding brightly colored bars or backgrounds, it will lead to failed scans.
The best combo is simple: black bars on a white background. Dark blue and dark green bars are also suitable, but avoid reddish bars. As mentioned, keep backgrounds white or as light as possible. Print bars in one ink color; avoid using the four-color process.
Print at 300 dpi or higher. When space allows, aim for roughly 1.5 inches by 1 inch for UPC-style labels. Don’t shorten the bars (truncation reduces scan rates) and leave clear quiet zones (the unprinted spaces) to the left and right so scanners can “see” the code.
3. Label your inventory
Apply each label to a flat part of the product, packaging, or a hangtag if the surface isn’t label‑friendly (like apparel). Limit the information on the barcode to an identifier only (UPC/EAN GTIN or internal ID) and include the human‑readable number under the symbol so staff can key it in if a label is damaged.
4. Configure hardware and software
Once you’ve labeled your inventory, connect scanners that your POS supports.
In Shopify POS, pair a supported Bluetooth scanner like the Socket Mobile 2D, or plug in a supported USB model like the Zebra DS2208. If you don’t have a dedicated scanner yet, the Shopify app can use your device camera to scan both 1D and 2D barcodes at checkout.
5. Make a test run
Run a quick end-to-end test to confirm your new inventory management system works correctly. Here’s how:
- Receive a product by scanning it against a purchase order.
- Sell it at your POS by scanning the same barcode.
- Process a return.
Confirm that the system reflects on-hand counts changed at the intended location after each step, and the product record shows an adjustment history.
6. Train employees on scanning procedures
A barcode system is only as good as the habits behind it. Start with a standard operating procedure for each workflow, like receiving, transfers, sales, and returns, and train all employees on that procedure. Cover both the software workflow and physical scanning technique. Your training should cover these practices:
- How to use the single workflow. Document which screen to open, what to scan, and the order of each step.
- How to track inventory. Enable inventory tracking for every stocked product so staff can view quantities and inventory history.
- How to review inventory changes. Teach staff to run inventory counts with Shopify POS. Have them confirm that each adjustment affects the correct location.
- How to properly scan products. Show staff how to hold the barcode scanner at the manufacturer’s recommended angle and distance to scan the full symbol and reduce glare.
- How to reprint damaged labels. Teach them how to keep quiet zones clear and place labels flat, position them away from seams or tape, and use the human-readable number to find the product before printing a new label.
Pros of a barcode inventory system
- Streamlines operations
- Improves the accuracy of inventory control
- Provides real-time data for better decision-making
- Improves inventory ROI
Barcode inventory systems replace repeated product entries with scannable IDs. Here are the pros:
Streamlines operations
Scanning takes staff to the correct product record during checkout and stock replenishment. It reduces typed product lookups and shortens transaction times.
Yann Marchal, partner at Momo Lifestyle, explains that if you work with third-party logistics (3PL), barcodes can ensure there’s a common language between retailers and the company. “We can’t expect the 3PL to know our different products and their specifications as well as we do,” he says. ”That’s why barcodes help to identify them.”
He recommends using a separate barcode for the product’s unit packaging and its master packaging to facilitate scalability. “This allows your 3PL to send full cartons of products to the warehouses of B2B customers, as well as single units of products direct to consumers.”
Improves the accuracy of inventory control
Barcode scanning reduces mistakes caused by manual product entry. Staff can confirm the product variant and location before updating inventory.
Tennis Giant assigned barcodes to every product as it moved away from manual systems. Scanning transfers prevented mistakes between size and color variants. Each sale also updated availability across its online store and pro shops in real time.
More reliable counts improve inventory accuracy. They also reduce the likelihood of overstocking and stockouts.
Provides real-time data for better decision-making
Barcode scans feed sales and inventory movements into the same system. Stores can see which products sell quickly and which locations need more stock.
Elite Eleven unified its in-store and online inventory data with its warehouse system. Store staff used current availability to place ship-to-customer orders from warehouse inventory. The brand averages more than 30 of these orders per day and reports up to $3,000 in incremental daily revenue.
Improves inventory ROI
Barcode systems can reduce labor spent rescanning products, replacing labels, and correcting shipment errors.
Research commissioned by GS1 US and conducted by VDC Research found that organizations relying mainly on 1D barcodes had a 7% first-pass scan-failure rate and a 1.5% relabeling rate in warehouse and distribution work.
Consider how many items your staff scan barcodes each week. Say it’s 15,000 items flat across receiving counts and checkout, and scanning saves six seconds per item versus typing. That’s 25 hours per week, and around 108 hours per month saved before even factoring in time from unscannable labels.
If you’re paying around $20 per hour per associate, that’s about $2,165 of labor cost per month.
Cons of barcode inventory system
No matter the inventory management system you choose, there are always a few drawbacks. Before jumping in, consider the main cons of using barcodes:
Upfront costs
Implementing a barcode inventory management system requires an upfront investment in hardware, software, and infrastructure. Retailers need to consider the cost-benefit ratio and ensure the investment aligns with their business scale and budget.
Training time
Your team will need to learn how to use the new system. This can take time and might slow things down at first. But once everyone’s up to speed, processes should run smoothly.
Technical issues
Sometimes, technology can malfunction. Scanners might not read a barcode or the software could have a glitch. It’s important to have good tech support to fix any problems quickly.
Barcode inventory management apps
Small merchants can test barcode workflows through a free plan or short trial. syncX and iPacky offer free tiers, and EasyScan includes a 10-day trial.
1. syncX

syncX is a user-friendly barcode scanner app with a simple setup. The app lets users quickly scan and decode barcodes, making it an ideal tool for retailers getting started.
The app also makes it simple to add and deduct inventory quantity in-store and transfer stock between locations.
syncX allows you to:
- Find products by barcode or SKU
- Update inventory quantities at a selected location
- Transfer stock between locations
- Create and fulfill orders by scanning products
- View transaction records and download them as CSV files
Pricing: Free for up to 200 inventory updates. Paid plans begin at $5 per month and include a 14-day free trial.
2. EasyScan: SKU & Barcode

EasyScan works with barcode scanners and mobile devices. It covers barcode creation as well as warehouse inventory and order fulfillment.
EasyScan allows you to:
- Generate custom SKUs, barcodes, and product labels
- Run stock counts and transfers across locations
- Record bin locations and putaway activity
- Pick, pack, check, and fulfill orders by barcode
- Create purchase orders and forecast demand from sales data
- Print packing slips, pick lists, and inventory reports
Pricing: Barcode generation and label printing begin at $9.99 per month. Inventory and fulfillment features begin at $39.99 per month. Plans include a 10-day free trial.
3. iPacky

iPacky is a barcode inventory app for Shopify that streamlines the order fulfillment process. It offers tools for barcode scanning, batch picking, and packing, helping retailers reduce errors and increase efficiency in their packing and shipping operations.
iPacky allows you to:
- Check order items through barcode scanning
- Create printed or on-screen batch picking lists
- Record bin locations and optimized picking routes
- Handle kits, bundles, and sets
- Create packing reports with a record of staff activity
- Customize workflows for multiple users
Pricing: Free for up to 50 store orders per month. The Standard plan costs $19.99 per month plus volume-based order fees and includes a 14-day free trial.
Barcode inventory management FAQ
How do I create a free inventory barcode?
Creating a free inventory barcode is simple. Here’s how to do it:
- Choose a barcode generator. Choose a free online barcode generator app.
- Enter product details. Add the information you want on the barcode, like product name or price.
- Generate and download. Click to create your barcode, then download it for printing or digital use.
What is the difference between a SKU and a UPC?
Stock keeping units (SKUs) and barcodes (UPCs) are both for tracking products, but they serve different purposes:
- SKU. A unique code created by a retailer to identify and track a specific product. SKUs are used internally in inventory management to differentiate products based on characteristics like size, color, or style.
- UPC. A standardized 12-digit product identifier encoded in a barcode. The same product variant uses the same UPC across retailers, making it suitable for checkout and product identification.
SKUs are for internal product tracking, while barcodes are for universal scanning and identification.
Is there a free app to scan barcodes for inventory?
Yes. syncX and iPacky have free plans, while 506 EasyScan offers a 10-day free trial.
- syncX. The free plan includes up to 200 inventory updates. Users can change quantities and transfer stock between locations. Paid plans begin at $5 per month.
- EasyScan. The app generates SKUs, barcodes, and product labels. Its Basic plan costs $9.99 per month after a 10-day trial. Inventory and fulfillment tools begin at $39.99 per month.
- iPacky. The free plan covers up to 50 store orders per month. It includes barcode order checking, bin locations, bundle handling, and order fulfillment. The Standard plan costs $19.99 per month plus volume-based order fees.
How do I set up a barcode inventory system with Shopify?
To set up a barcode inventory system with Shopify, follow these steps:
- Choose your barcode type. Decide on the barcode type that best suits your products. Common types include UPC, EAN, and QR codes.
- Generate barcodes. Use a barcode generator tool to create barcodes for each product. Shopify’s Retail Barcode Labels app can help you generate and print barcode labels.
- Assign barcodes to products. In your Shopify admin, go to the product’s details page and assign the generated barcode to the corresponding product.
- Set up barcode scanning hardware. Choose between handheld barcode scanners or mobile barcode scanning apps. Handheld scanners can be wired or wireless, and mobile apps can use your device’s camera for scanning.
- Integrate barcode scanning with inventory management. Use the Shopify mobile app or a compatible barcode scanner to scan products and update inventory levels in real time.
- Train your staff. Ensure your team is familiar with the barcode scanning process and the inventory management system.
- Test your system. Before fully implementing the barcode inventory system, test it thoroughly to ensure it works as expected.
Can I use my phone as a barcode scanner?
Yes. The Shopify mobile app can use the phone’s camera to scan barcodes (1D and 2D), assign barcodes to products, and adjust on-hand counts. For high-volume work, a dedicated 2D scanner is faster, handles damaged labels better, and is more ergonomic.